


A leaky sink connection can be a frustrating problem to deal with, leading to wasted water, potential damage to your kitchen or bathroom, and higher utility bills. One common cause of such leaks is a faulty or worn-out sink hose, which is responsible for connecting the faucet to the water supply. If you’ve noticed dripping water beneath your sink or damp spots around the faucet, it might be time for a sink hose replacement. In this guide, we’ll walk you through the process of replacing a leaky sink connection, ensuring that you can tackle the job yourself with confidence.
Why Replacing Your Sink Hose Is Important
Before diving into the steps of replacing a sink hose, let’s first understand why it’s necessary. A sink hose, also called a faucet supply line, carries water from your home's plumbing system to the faucet. Over time, this hose can become worn out due to constant exposure to water pressure, age, or even physical damage. When this happens, leaks can form, which can lead to water wastage and potential damage to your cabinetry or flooring.
By replacing the faulty hose, you not only stop the leak but also ensure that your faucet continues to function properly without any interruptions. Additionally, replacing a sink hose is a relatively simple and affordable DIY project that can save you from having to call in a plumber.
Signs That It’s Time for a Sink Hose Replacement
There are a few clear indicators that it’s time to replace your sink hose:
Leaking Water: The most obvious sign is water pooling underneath the sink or dampness around the faucet base. This indicates that there is a leak in the hose.
Low Water Pressure: If you notice a decrease in water pressure when you turn on the faucet, it could be due to a crack or break in the hose.
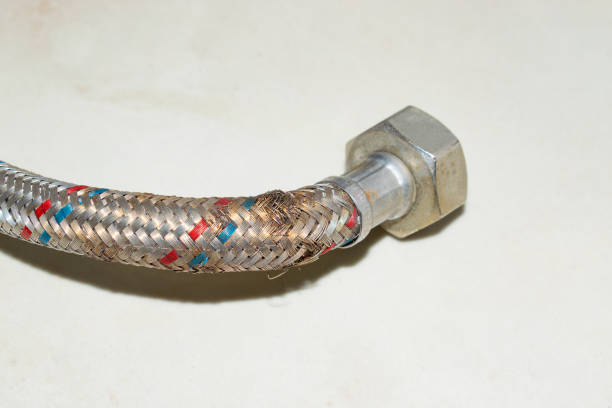
Visible Damage: If the hose is visibly cracked, bulging, or corroded, it’s time to replace it. Damaged hoses are more likely to fail and cause further issues down the line.
Age: If your hose is several years old, it’s wise to replace it as part of regular maintenance. Over time, the material can deteriorate even without visible damage.
Tools and Materials You’ll Need
Before you get started, make sure you have all the necessary tools and materials:
- Replacement sink hose (make sure it’s the correct length and size)
- Adjustable wrench
- Pipe tape (also called Teflon tape)
- Bucket or towel (for any residual water)
- Pliers (optional)
- Work gloves (optional but helpful)
Having these tools on hand will make the job go smoothly and help you avoid delays.
Step-by-Step Guide to Replacing Your Sink Hose
Turn Off the Water Supply
Before beginning any work on your sink, it’s crucial to turn off the water supply to avoid flooding your kitchen or bathroom. Most sinks have separate shut-off valves for both hot and cold water. These valves are usually located under the sink near the water pipes. Turn them clockwise to close the valve. If your sink does not have individual shut-off valves, you may need to turn off the main water supply to your home.
Drain Any Remaining Water
Once the water supply is shut off, open the faucet to relieve any remaining water pressure in the lines. This will also help prevent any water from dripping while you’re working. Place a bucket or towel beneath the sink to catch any residual water that might escape when disconnecting the hoses.
Disconnect the Old Sink Hose
Next, locate the connection points where the sink hose is attached to the faucet and the water supply line. These connections are typically secured with nuts or bolts. Using your adjustable wrench, carefully loosen the nuts that secure the hose to both ends. If the nuts are too tight, you may need to use pliers or apply a little penetrating oil to help loosen them.
Prepare the New Sink Hose
Now that you’ve removed the old hose, it’s time to install the new one. Before attaching the new hose, apply a small amount of pipe tape (Teflon tape) to the threads of the faucet and the water supply line. This helps ensure a secure, leak-free connection and prevents any future leaks. Wrap the tape around the threads a few times, but don’t overdo it—too much tape can make it difficult to tighten the connection properly.
Attach the New Sink Hose
Take the new sink hose and carefully attach one end to the faucet connection and the other end to the water supply line. Tighten the nuts by hand, and then use your adjustable wrench to tighten them further. Be careful not to overtighten, as this could damage the threads or cause the hose to crack. A firm, snug fit is sufficient to prevent leaks.
Turn On the Water Supply
Once the new hose is securely connected, it’s time to turn the water supply back on. If you turned off individual shut-off valves, turn them counterclockwise to open the water flow. If you had to turn off the main water supply, turn it back on. Slowly open the faucet and check for any leaks around the connection points. If you notice any leaks, tighten the connections slightly with your wrench.
Test the Faucet
Finally, run the faucet for a few minutes to test the new hose. Make sure both hot and cold water are flowing smoothly, and that there are no signs of leaks. Check again after a few hours to ensure everything remains secure and dry.
Conclusion
Replacing a leaky sink connection may seem like a daunting task, but with the right tools and a little know-how, it’s a simple job that anyone can handle. By following this beginner’s guide to replacing a leaky sink connection, you can restore your faucet’s performance and avoid the hassle and expense of hiring a plumber. Whether you’re replacing the hose due to wear and tear or because of a visible leak, taking the time to make the replacement yourself can save you money and provide peace of mind. Remember, regular maintenance of your sink and hoses, including timely sink hose replacement, can prevent future leaks and extend the life of your plumbing system.
Comments